Adjusting the printing density
Printing may be too dark or too light in some cases, depending on the environment in which the printer is used and the characteristics of the print media. In such cases, adjust the print density. The printing density can be adjusted to five levels.
ex. Printing on a tube is too light, so increase the printing density.
-
Press [Func].
|
|
-
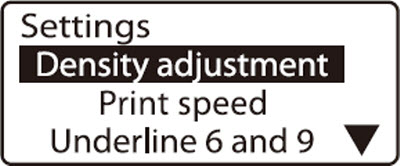
Press  or or  to select Density adjustment, then press [Enter]. to select Density adjustment, then press [Enter].
|

|
-
Press or to select Print density, then press [Enter].
|
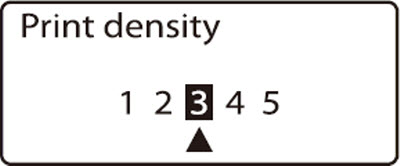
The indicates that the current print density is 3 (the standard setting).
|
-
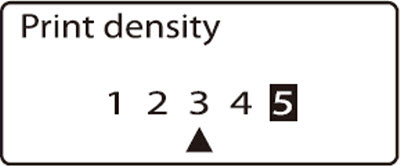
Press  twice to select 5. twice to select 5.
 Press Press  to make the printing density lighter. to make the printing density lighter.
|
|
-
Press [Enter].
|
If your product issue was not resolved after following the steps above, or if you require additional help, please create or log in to your Canon Account to see your technical support options.
Or if you still need help, visit our Canon Community by clicking the button below to get answers:

____________________________________________________________________________________________
