Generating sequential characters (serial printing)
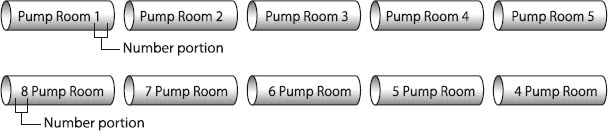
Assume that you want to produce the following tubes.
 Serial characters can be set in only one place on a page.

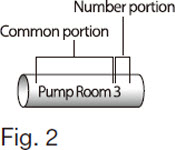
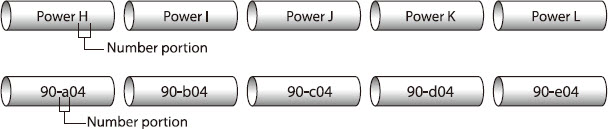
The portion of the character data consisting of number from 1 to 9 is incremented or decremented by 1 each time it is printed, and is called the number portion. The remaining portion of the character data is called the common portion. (Fig. 2)
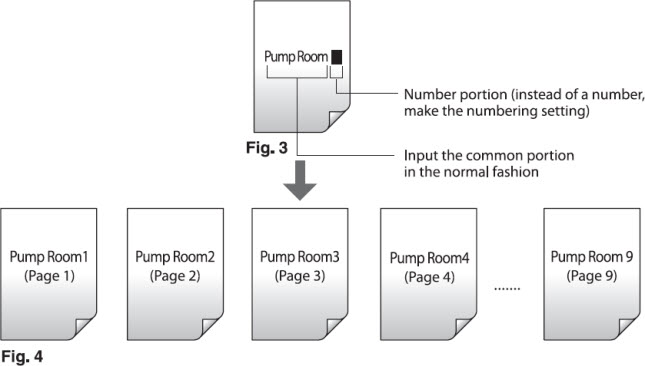
To print tubes that contain a number portion such as those shown in Fig. 1, it is not necessary to explicitly create ten pages with character data ranging from Pump Room 1 to Pump Room 9 (as shown in Fig. 4). Instead, you need only create one page of character data consisting of a common portion and a number portion as shown in Fig. 3, then print that page.
ex. Produce the tubes shown in Fig. 1.
-
Enter Pump Room.
|

|
-
Press [Num].
|
|
-
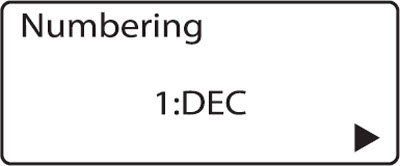
Press  or or  to select 1:DEC, then press [Enter]. to select 1:DEC, then press [Enter].
In addition to decimal numbering, you can also specify hexidecimal or alphabetical numbering.
If you accidentally enter an incorrect number, press [Back Space] to delete the number and then enter the correct one.
|
|
-
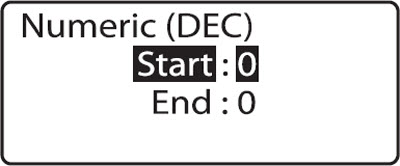
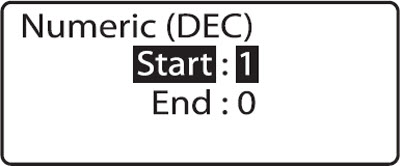
Press  or or  to select Start, then enter 1. to select Start, then enter 1.
Numbering in descending order
For example, if you enter 9 as the start value and 5 as the end value, you can set up numbering in descending order (9, 8, 7, 6, 5).
|
|
-
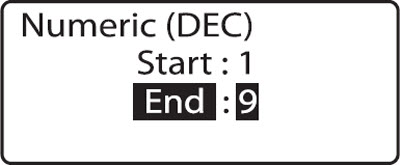
Press or to select End value, then enter 9.
|
|
-
Press [Enter].
|
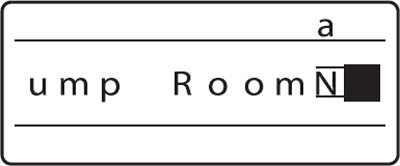
The number portion is displayed with N.
|
-
Press [Enter].
|
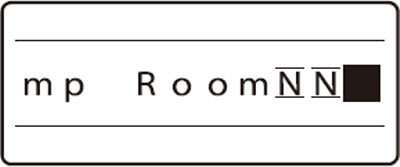
The number portion is displayed with an N.
|
-
Start printing.
|
Printing Two or More Pages
When there are two or more pages with data and one or more of them are blank due to the deletion of text, the blank pages are fed idly (space characters are printed).
Various types of numbering print
The following different types of numbering print are possible.
For decimal numbering: Select Dec in step 3.
For hexadecimal numbering: Select Hex in step 3.

For alphabetical numbering: Select A - Z or a - z in step 3.
Changing and deleting serial characters
For example, if the numbers in the number portion run from 8 to 12, the number of digits needed for 8 and 9 differs from the number of digits needed for 10 through 12. In this case, it is possible to insert either a 0 or a space in front of the 8 and 9 so that the number of digits is the same as for 10 through 12. This function is called Padding character. Note that the padding character setting display does not appear if all of the numbers in the number portion have the same number of digits or if alphabet was selected for numbering.
-
To remove serial characters, delete the N (number symbol) using [Backspace].
-
To change the serial character, move the cursor to N and press [Number].
-
To enter a common character after a serial character, enter it after N before pressing [Enter].
Printing of multiple pages
When a blank page(s) is created after deletion of characters on an entire page in the input data comprising multiple pages, the page(s) is fed idly (with blank page(s) printed).
If your product issue was not resolved after following the steps above, or if you require additional help, please create or log in to your Canon Account to see your technical support options.
Or if you still need help, visit our Canon Community by clicking the button below to get answers:

____________________________________________________________________________________________
