Before Starting
Your printer, by default is set to have an IP address assigned automatically by your router. This article will walk you through assigning a static IP address through the Remote UI (User Interface). Please keep the following points in mind.
-
If you set a static IP address that is different from the IP address currently assigned to your printer, you will lose the connection you have to the printer's Remote UI. You will need to use the printer's new IP address to connect to the Remote UI.
-
If you have set a static IP address for the printer but you then decide to have the printer automatically receive an IP address from your router, you will most likely lose the connection you have to the printer's Remote UI. You will need to use the printer's new IP address to connect to the Remote UI.
Steps to set a static IP address
 The screenshots in this article are from an iOS device. However, the steps will be similar (if not exactly the same) regardless of the computer or device you're using.
-
If you don't have the printer's IP address, print a network configuration page.
-
Open a web browser (Edge, Firefox, Chrome, Safari, etc.) and enter the printer's IP address into the address bar.
-
The printer's Remote UI will appear in a web browser. Click or tap Log on.

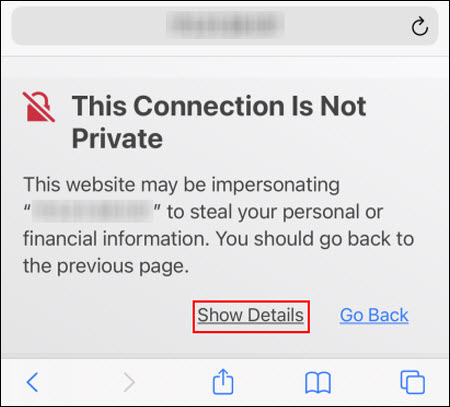
 If a warning message similar to the one shown below appears, click or tap Show Details or the appropriate option.
Click or tap visit this website (the web browser that you use may offer a different option, click or tap it to continue).
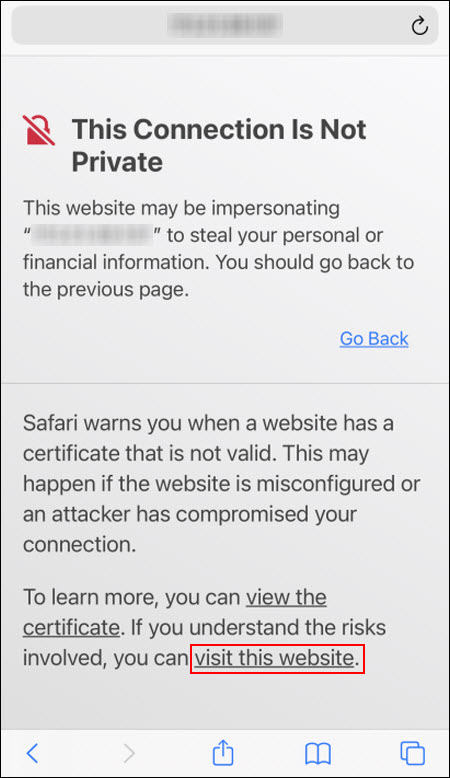
You may need to click or tap another option to confirm that you want to proceed. If you are prompted again to continue, click or tap the appropriate affirmative option.
-
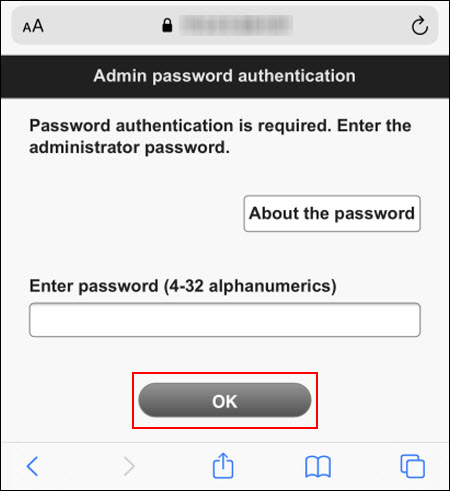
Enter the password for your printer, then click or tap OK.
-
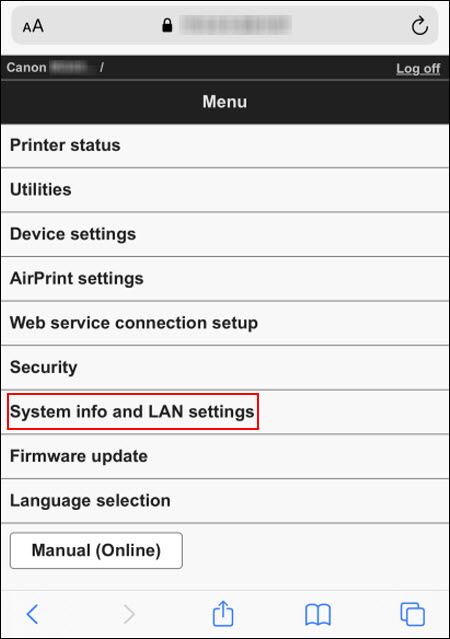
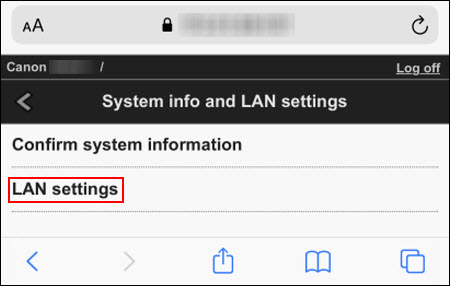
Click or tap System info and LAN settings.
-
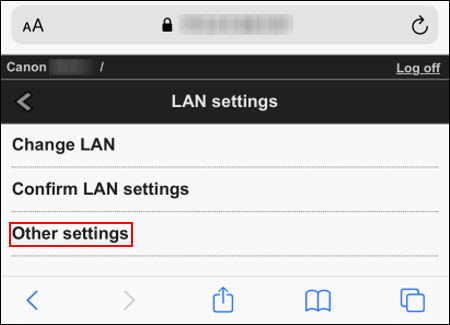
Click or tap LAN settings.
-
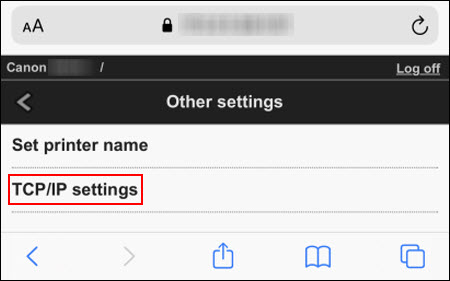
Click or tap Other settings.
-
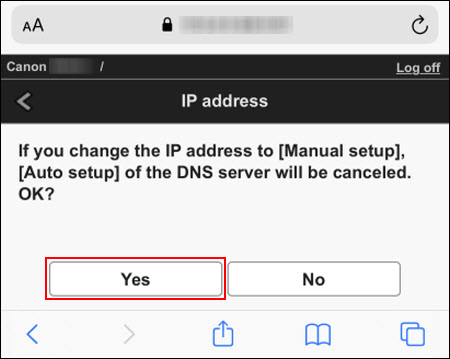
Click or tap Yes.
-
Click or tap TCP/IP settings.
-
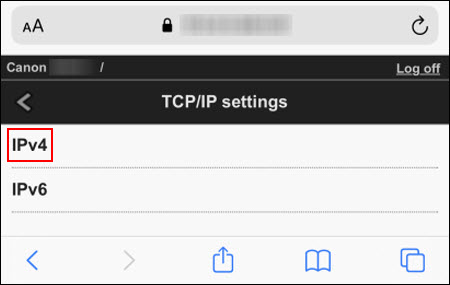
Click or tap IPv4.
-
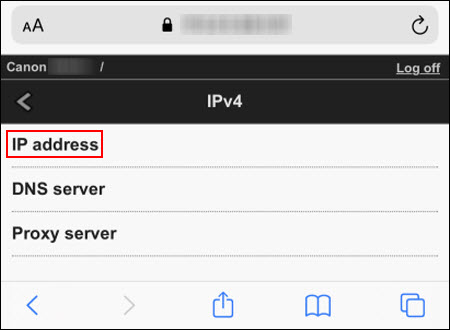
Click or tap IP address.
-
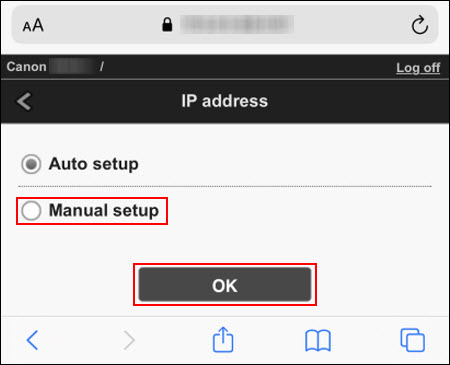
Click or tap Manual setup, then click or tap OK.
-
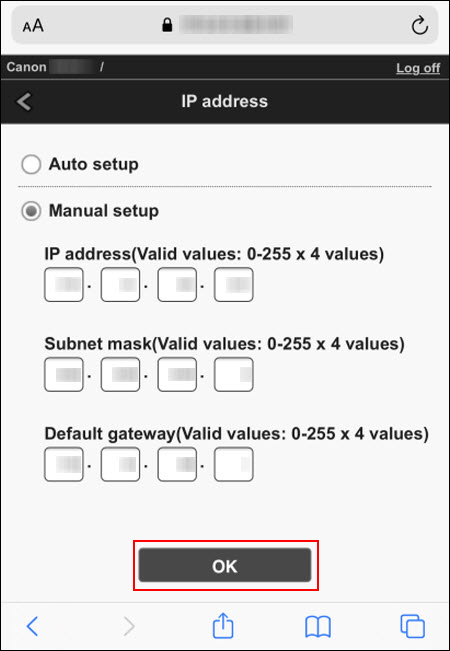
Enter the IP address, Subnet mask, and Default gateway. Click or tap OK when finished.
-
If this prompt appears, click or tap OK.
The IP address will be set to the one you specified.
If your product issue was not resolved after following the steps above, or if you require additional help, please create or log in to your Canon Account to see your technical support options.
Or if you still need help, visit our Canon Community by clicking the button below to get answers:

____________________________________________________________________________________________
