Registering a Fax / Telephone Number Using Speed Dial Utility2
Follow the procedure below to register fax / telephone numbers.
 Before you register fax / telephone numbers using Speed Dial Utility2, make sure that no fax operations are in progress.
-
Start up Speed Dial Utility2.
-
Select a printer from the Printer Name: list box, and then click Display Printer Settings.
-
Click TEL Number Registration from Setting Item List:.
The list of registered fax / telephone numbers is displayed.
-
Select an unoccupied code from the list, and then click Edit....
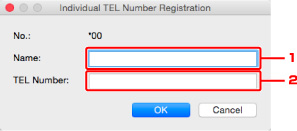
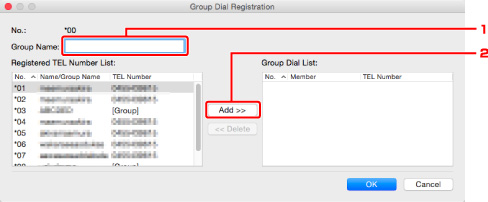
The Individual or Group Selection dialog is displayed.
-
Click Register individual TEL number or Register group dial, and then click Next....
-
Click OK.
To continue registering fax / telephone numbers or a group dial, repeat steps 4 to 6.
If your product issue was not resolved after following the steps above, or if you require additional help, please create or log in to your Canon Account to see your technical support options.
Or if you still need help, visit our Canon Community by clicking the button below to get answers:

____________________________________________________________________________________________