To set up the SELPHY CP910 so that it can work with a direct wireless connection with mobile devices and computers, follow the steps below.
-
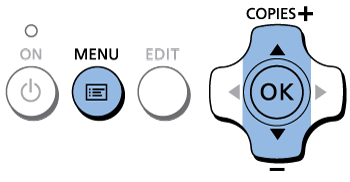
With the printer powered on, press the MENU button < >.
>.
-
Press the < ><
>< > buttons to select [Wi-Fi Settings], and then press the <OK> button.
-
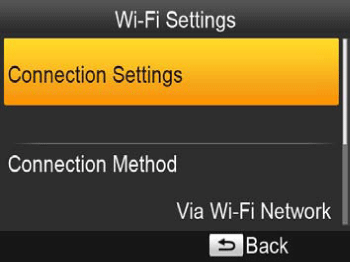
Press the <><> buttons to select [Connection Settings], and then press the <OK> button.
-
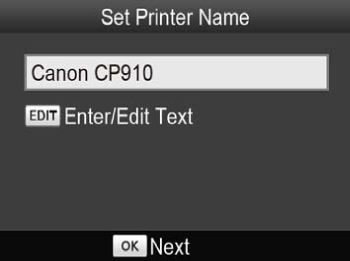
Check the displayed printer name and press the <OK> button.
When you connect devices via Wi-Fi, this name will be displayed on the target device to identify the printer.
You can change the printer name by pressing the EDIT button.
-
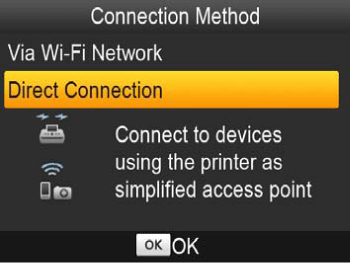
Press the <><> buttons to select [Direct Connection], and then press the <OK> button.
-
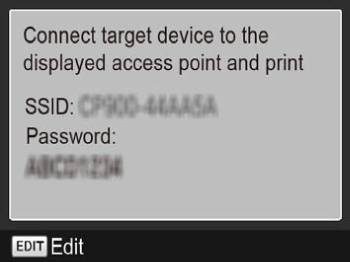
The screen below is displayed.
You can change the password by pressing the EDIT button.
If your product issue was not resolved after following the steps above, or if you require additional help, please create or log in to your Canon Account to see your technical support options.
Or if you still need help, visit our Canon Community by clicking the button below to get answers:

____________________________________________________________________________________________
