Specify a DNS Server
-
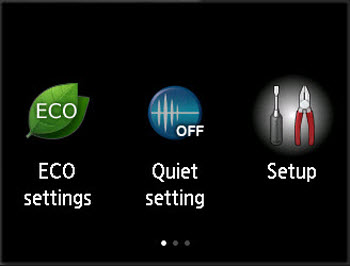
From the HOME screen, flick the screen over to Setup and tap it.
-
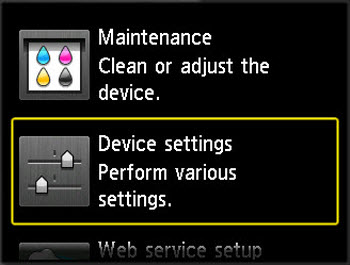
Tap Device settings.
-
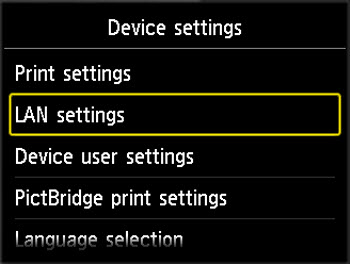
Tap LAN settings.
-
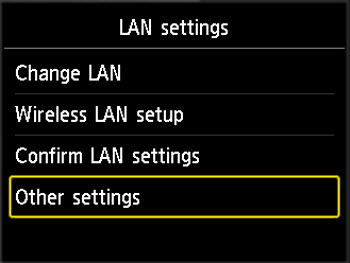
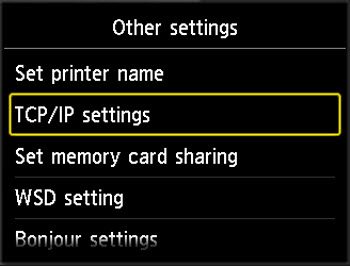
Tap Other settings.
-
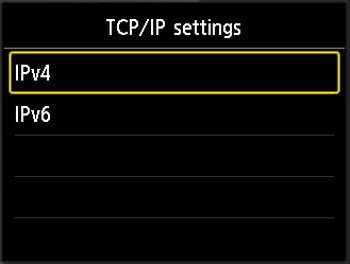
Tap TCP/IP settings.
-
Tap IPv4.
-
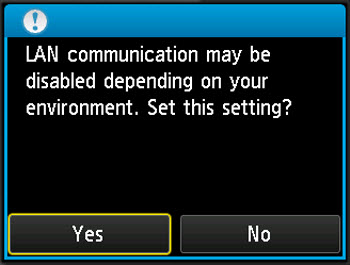
Tap Yes.
-
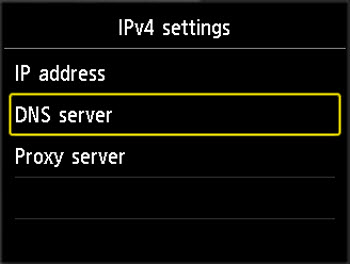
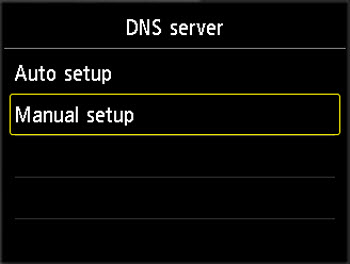
Tap DNS server.
-
Tap Manual setup.
-
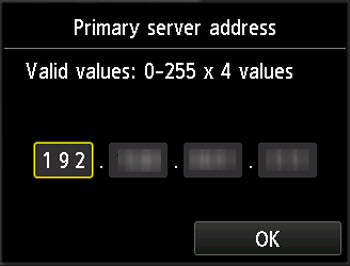
The printer will ask you to specify an IP address for the primary DNS server. Tap the first group of numbers on the touch screen.
-
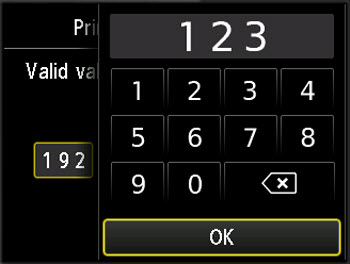
Tap the numbers to specify the first part of the IP address for the primary DNS server. Tap OK when finished.
-
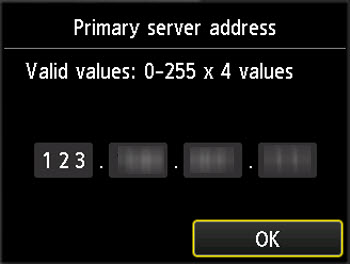
Repeat this process for the next three groups of numbers for the Primary server address. Tap OK when finished.
-
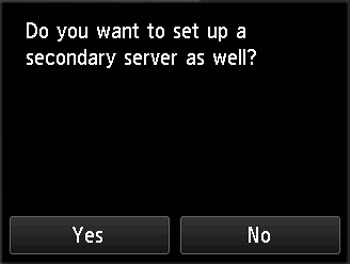
You will be asked if you want to set up a secondary server. If you tap Yes, repeat steps 10 - 12 to specify the IP address for the secondary DNS server. If you don't want to specify a secondary server, tap No.
The DNS server is set.
 To have the printer automatically configure its DNS server settings, select Auto setup in step 9.
If your product issue was not resolved after following the steps above, or if you require additional help, please create or log in to your Canon Account to see your technical support options.
Or if you still need help, visit our Canon Community by clicking the button below to get answers:

____________________________________________________________________________________________
