To set a static IP address on the PIXMA TR7020, follow the steps below.
-
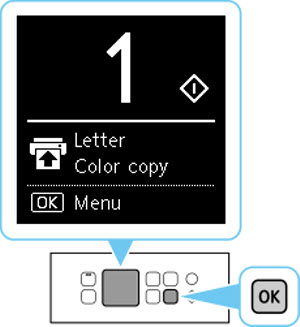
With the printer powered on and displaying the main screen, press the OK button.
-
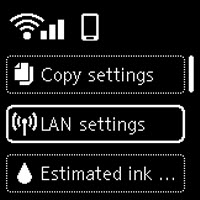
Press the down arrow to select LAN settings. Press the OK button.
-
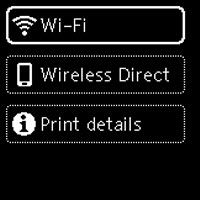
Wi-Fi will be selected. Press the OK button.
-
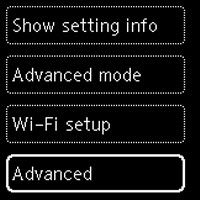
Press the down arrow until Advanced is selected. Press the OK button.
-
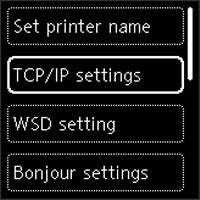
Press the down arrow to select TCP/IP settings. Press the OK button.
-
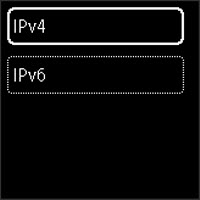
IPv4 will be selected. Press the OK button.
-
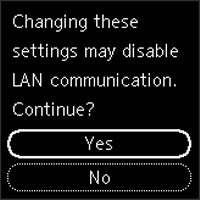
Yes will be selected. Press the OK button.
-
IP address will be selected. Press the OK button.

-
Press the down arrow to select Manual setup. Press the OK button.

-
The printer's current IP address will be shown on the screen. Use the up and down arrows to change the first number of the printer's IP address.
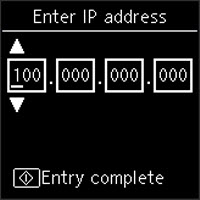
Press the OK button to move to the next number of the IP address. You will notice arrows above and below the number. These arrows indicate which number in the IP address you are currently changing.
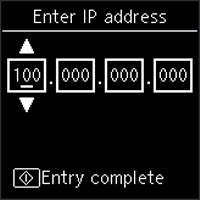
Use the up and down arrows to change this number, then press the OK button when you have selected the number you want to assign to the printer. To go back to a previous number in the IP address, press the Back  button.
The following example shows an IP address of 192.168.1.157 for the printer:
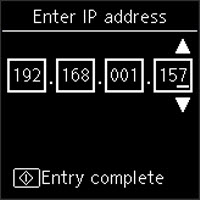
To complete this process and assign the IP address to the printer, press the Start  button.
-
Repeat this process for the subnet mask and default gateway.
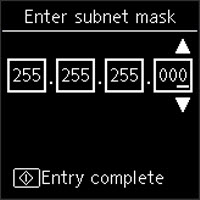
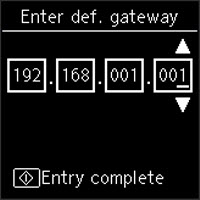
After specifying the subnet mask and default gateway, press the Start button.
-
After processing for a few moments, the printer will return to the screen shown in step 8.
-
Repeatedly press the Back button until the main screen returns. The printer now has the static IP address, subnet mask, and default gateway specified.
If your product issue was not resolved after following the steps above, or if you require additional help, please create or log in to your Canon Account to see your technical support options.
Or if you still need help, visit our Canon Community by clicking the button below to get answers:

____________________________________________________________________________________________
