Follow the steps below to select a fax rejection condition.
- Make sure the printer is powered on.
- Select
 Setup on the HOME screen.
- Select
 Printer settings.
- Select Fax settings.
- Select Security control.
- Select Fax reception reject.
- Select ON.
- Select a condition of rejecting fax reception.
No sender info.
- Rejects faxes with no caller identification.
Not in directory
- Rejects faxes from the senders not registered in the printer's directory.
Rejected numbers
- Rejects faxes from the senders registered in the printer as rejected numbers.
Information on registering a rejected fax number can be found below.
 When the printer rejects reception, Reception rejected. is displayed on the Fax standby screen.
Faxes with no caller identification are also rejected when the setting other than No sender info. is selected.
Register the rejected number following the procedure below.
- When confirmation screen to register rejected number is displayed, select Yes.
- Select a registration number.
- Select a registration method.
- Register the rejected number depending on the registration method:
- By entering the number
When you select this registration method, the screen to register the fax / telephone number is displayed.
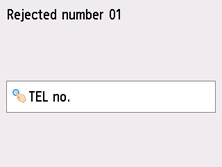
Select the entry field of fax / telephone numbers to display the screen to enter the fax / telephone number. Enter the fax / telephone number you want to register, and then select OK.
- From outgoing call log
When you select this registration method, the screen to select the fax / telephone number from the outgoing call logs is displayed.
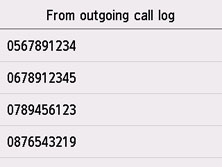
Select a fax / telephone number you want to register.
- From incoming call log
When you select this registration method, the screen to select the fax / telephone number or the name from the incoming call logs is displayed.
Select a fax / telephone number or a name you want to register.
- Select Register to finalize registration.
To register another rejected number, select another registration number, and then register the rejected number.
You can register up to 10 rejected numbers.
 You can print the list of rejected numbers (REJECTED NUMBER LIST).
To change the registered rejected number:
- Select a registered rejected number you want to change.
- Select Edit.
- Select the entry field of fax / telephone numbers.
The screen to change the registered rejected number is displayed.
- Change the registered rejected number in the same procedure as when you registered it.
- Finalize the registration in the same procedure as when you registered it.
To delete the registered rejected number:
- Select a registered rejected number you want to delete.
- Select Delete.
The confirmation screen is displayed.
- Select Yes.
You can also register the rejected number by selecting Function list on the Fax standby screen, and then selecting Rejected numbers under TEL number registration.

