 The printer cannot be turned off while it is sending or receiving a fax, or when the received fax or the unsent fax is stored in the printer's memory. Make sure that all faxes have been sent and received, press the printer's Stop button to stop printing, and then turn off the printer.
-
Press the printer's Stop  button.
-
Turn the printer off and unplug it.
-
Retract the paper support and the paper output tray.
-
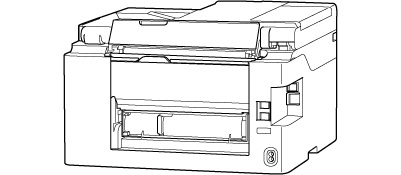
Turn the printer so that its rear side faces toward you.

When changing the orientation of the printer, do not turn the printer upside down or tilt it. The ink may leak out.
-
Pull out the transport unit cover.
-
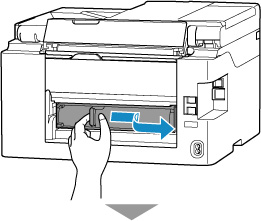
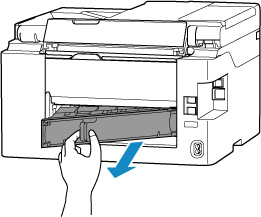
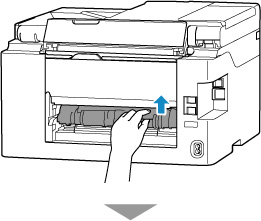
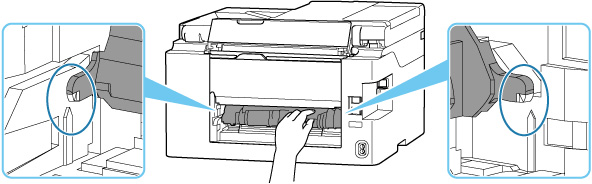
Hold the jammed paper firmly with both hands and pull it out slowly.
If the paper is rolled up, pull it out and grasp the edges of the paper.
 Do not touch the inner parts of the printer.
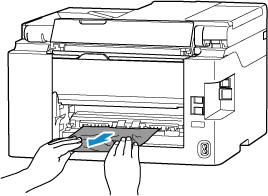
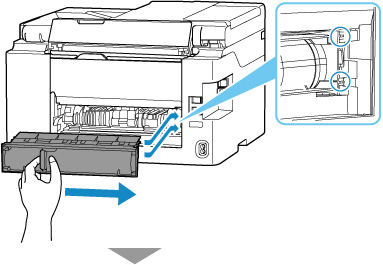
If you are unable to remove the jammed paper, follow the steps below to detach the transport unit and then remove the paper.
-
Lift up the transport unit and pull it out.

-
Slowly pull out the jammed paper.
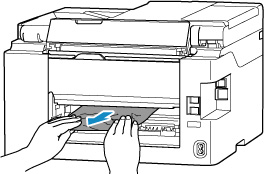
Do not touch the inner parts of the printer.
-
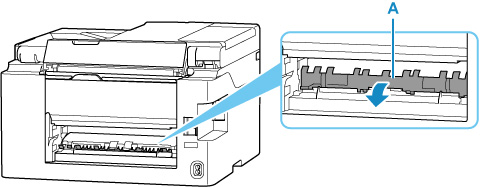
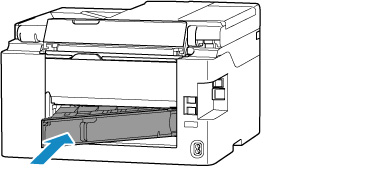
Make sure all jammed paper is removed.
-
If parts (A) are raised, tip them toward you.
If you replace the transport unit without lowering parts (A) toward you, it could damage the printer.
-
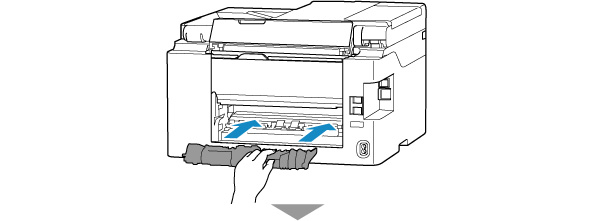
Insert the transport unit until it reaches the back of the printer.
-
Insert the projections of the right side of the transport unit cover into the printer, and then push the left side of the transport unit cover until it is closed completely.
-
Plug the printer back in and power it on.
-
Load paper:
Make sure you are using suitable paper and loading it correctly.
We recommend using paper sizes other than A5 to print documents with photos or graphics. A5 paper may curl and jam as it leaves the printer.
-
All jobs in the print queue are canceled. Redo the printing.
If the measures above do not solve the problem, the printer requires servicing.
There are two options currently available to you.
- Warranty Service – If you are within the 1-year manufacturer’s warranty and have your proof of purchase you are entitled to service or replacement. If you have purchased a CarePak Canon extended warranty, you may be entitled to additional options. Please create or log into your Canon Account to obtain service.
- Out of Warranty – If you are outside of your warranty period, you may qualify for purchasing a replacement through the Canon Upgrade Program. Please contact our Sales group to inquire about your upgrade options at 866-443-8002.
To verify your support options please create or log into your Canon Account.
Do not tilt the printer when moving it since the ink may leak out.
 Learn how to prepare the printer for shipping when a repair is needed.
