Paper Settings
By registering the paper size, you can prevent the printer from misprinting by flashing the Alarm lamp before printing starts when the paper size of the loaded paper differs from the print settings.
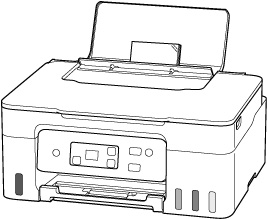
After loading paper:
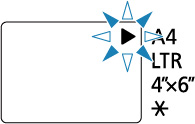
 flashes.
Register the paper size according to the loaded paper.
Media type is set depending on the paper size.
|
Paper size
|
Media type
|
|
A4, LTR
|
Plain paper
|
|
4"x6"
|
Photo paper
|
|
 (Optional) (Optional)
|
Optional
|
 The is set to the same as the paper size and type set in paper information of the Remote UI.
By default, the legal-sized plain paper is set as the paper size and type in this printer.
When the paper size setting for printing is different from the paper size setting set to the printer:
Ex:
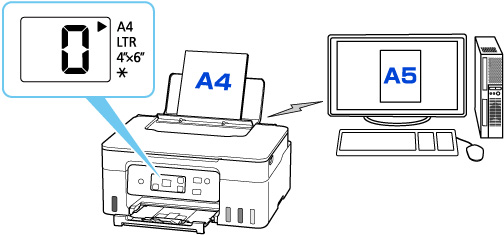
When you start printing, an error code appears on the LCD.
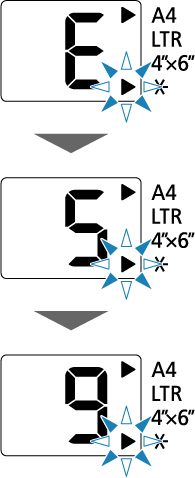
Select one of the operations below.
-
Print on set paper
-
You print on the paper loaded without changing the paper size setting. Press the Color button or the Black button.
-
For example, when the paper size setting for printing is A5 and the paper size setting set to A4 on the printer, the printer starts printing with A5 on the paper loaded.
-
Printing after replacing paper
-
You print after replacing paper loaded in the rear tray.
-
For example, when the paper size setting for printing is A5 and the paper size setting set to A4 on the LCD, you load A5 sized paper before you start printing.
-
Cancel printing
-
Press the Stop button to cancel printing and change the paper size setting specified for printing. Try printing again.
If your product issue was not resolved after following the steps above, or if you require additional help, please create or log in to your Canon Account to see your technical support options.
Or if you still need help, visit our Canon Community by clicking the button below to get answers:

____________________________________________________________________________________________
