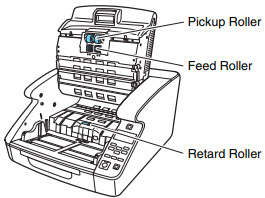
Removing and Reinstalling the Rollers - DR-G2xxx series scanners
Article ID: ART181702
|
Date published: 03/20/2023
|
Date last updated: 03/20/2023
Description
To clean or replace the pickup, feed or retard rollers, follow the procedure below to remove and reinstall the rollers.
Solution
CAUTION
Turn OFF the power switch, and disconnect the power plug from the power outlet when you remove or reinstall the rollers. Leaving the power turned ON may result in electrical shock.
Do not place excessive force on the rollers when removing or reinstalling the rollers. Deformation of the rollers may cause feed errors.
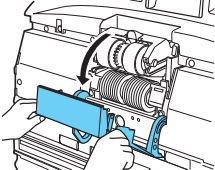
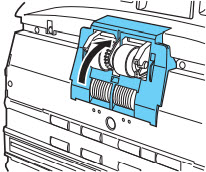
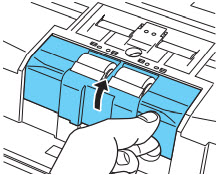
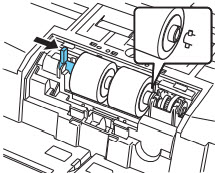
Open the roller holder.
The roller holder returns to its original position when released.
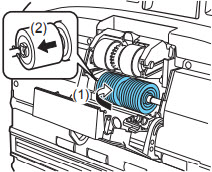
Remove the pickup roller, and install a clean or replacement Pickup Roller.
Install the Pickup Roller so that the side with the gear is on the left.
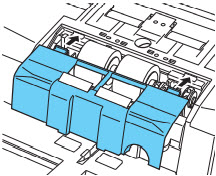
Close the roller cover. Make sure that the front unit is completely closed by pushing until you hear a click.
Failure to firmly close the roller holder and roller cover may cause a feed error. Always be sure to check that the roller holder and roller cover are closed.
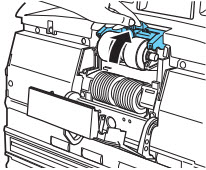
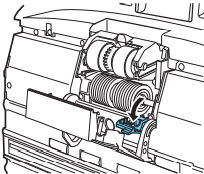
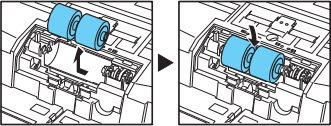
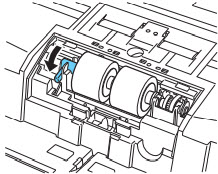
slide the feed roller to the right, and then pull them towards you.
Remove the feed roller.
Place the new feed roller on the pin.
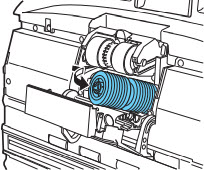
Put the feed roller in place (1), and align the notch in the roller's axle with the shaft on the scanner (2).
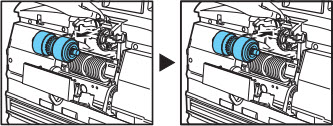
Push the roller lock lever up to lock the feed roller.
Close the roller cover. Make sure that the front unit is completely closed by pushing until you hear a click.
Failure to firmly close the roller holder and roller cover may cause a feed error. Always be sure to check that the roller holder and roller cover are closed.
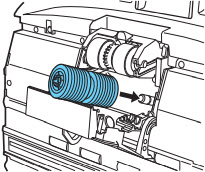
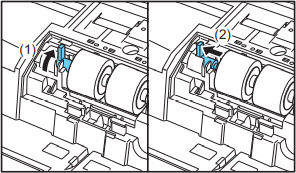
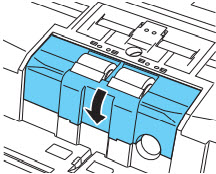
Grasp and pull the retard roller cover with your fingers to remove it.
Push the roller lock lever up (1) and move it to the left (2) to unlock the roller.
Remove the retard roller, and set a clean retard roller or a replacement retard roller. WARNING
The metal sections of the roller can become extremely hot after continuous use. Do not directly touch the metal. Wait until the roller has thoroughly cooled before replacing it.
Align the roller cutout to the axle on the scanner, and slide the roller securing lever in the direction of the arrow.
Pull the roller lock lever down to lock the retard roller in place.
Replace the retard roller cover.
Push the front of the retard roller cover in. Make sure that the front unit is completely closed by pushing until you hear a click.
Smoothly close the upper unit. CAUTION
Make sure that the hook is completely latched and the retard roller cover is not loose. If the retard roller cover is loose, the Document Feed Tray will catch on it causing the scanner to malfunction.

.gif) CAUTION
CAUTION