|
|
Placing documents on my DR-M1060 / DR-M1060 II Scanner
| Article ID: ART181785 |
| |
Date published: 03/28/2023 |
| |
Date last updated: 03/28/2023 |
Description
Follow the steps below to properly place your documents on the scanner.
Solution
- Switch the feed method based on the type of document you are scanning.
When scanning plain paper or business cards, set the feed selection lever to the standard feeding position (lower position). The pages of a multi-page document will be separated and fed one page at a time.
When scanning bound or fastened paper (e.g. invoices), set the feeding selection lever to the non separation feeding position (upper position). As documents are scanned without page separation, place the documents one page at a time (one set in the case of bound or fastened paper).

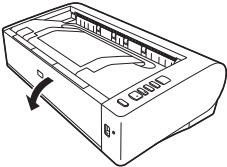
- Open the document feed tray.
- Switch the eject method based on the type of document you are scanning.
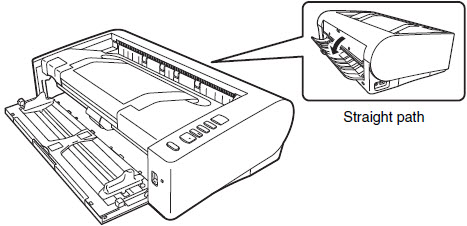
Ordinarily, you should scan with the straight path tray at the rear of the scanner closed (U-turn path).
When scanning business cards, plastic cards, or other documents you do not want to bend, open the straight path tray (straight path).
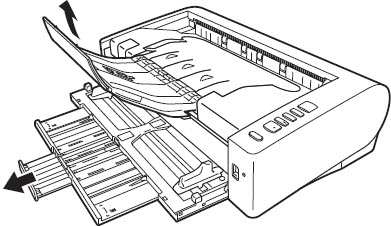
- If you are scanning long documents with the U-turn path, extend the document feed support and open the eject support.
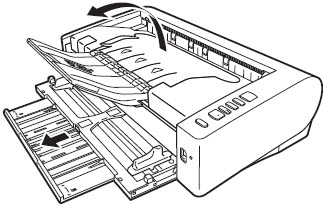
When scanning documents that are longer than LTR horizontal (216 mm), extend the feed support and eject support extensions.
- Adjust the document guides to fit the width of the document to be scanned.
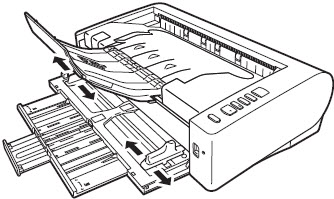
- Place the document.


- When placing documents into the feed tray, take care not to cut your hands on the edges of the paper.
- Make sure that the document does not exceed the loading limit marks (
 ) on the document guides. Up to 80 pages of ordinary plain paper (80 g/m2) can be loaded at the same time. ) on the document guides. Up to 80 pages of ordinary plain paper (80 g/m2) can be loaded at the same time.
- Before you place a document, check to make sure it does not contain paper clips, staples, or other small metal objects. These items may cause a fire or electrical shock, damage the document or cause a paper jam or scanner malfunction.
- Do not wear loose clothing or jewelry that may get caught in the scanner while you are using it, as this may result in personal injury. Be extra careful of neckties and long hair. If anything gets caught in the scanner, immediately turn OFF the power switch, and disconnect the power cord from the power outlet to stop scanning.
- Always smooth out any folds or curls in your documents before placing them into the feeder. If the leading edge of a document is curled, it may cause a paper jam.
- If feeding stops due to a system error or paper jam while the scanner is scanning, resolve the problem, make sure that the scanned image of the last page that was successfully fed has been saved, and then resume scanning the remaining document pages.
- After you have finished scanning, close the document feed tray, document eject extension support, and straight path tray to prevent damage to the scanner while it is not being used.
- When scanning multi-page documents that are fastened together (e.g. invoices), place the documents so that the fastened edge is toward the feed tray.
- Be careful when scanning paper that is longer than A3 size or thin paper, as the documents may fall off of the eject tray after scanning.
- When using the straight path, documents will be ejected from the rear of the scanner. Do not place any obstructions near the document eject outlet. To ensure that the documents are ejected smoothly, make sure that the scanner is placed on a smooth, flat surface.

|
