
Prepare the Media for Printing - MK3000
| Article ID: ART181893 | | | Date published: 04/25/2023 | | | Date last updated: 04/25/2023 |
Description
This article shows how to install the ribbon cassette, load the print media, and use the optional tube warmer of the MK3000.
Solution
Select an option below for more information.
 Dispose the used ribbon cassette according to local government regulation.
|
|
|
|
|
|
|
|
|
|
|
|
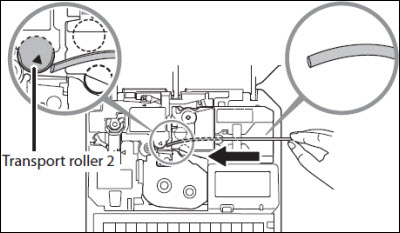
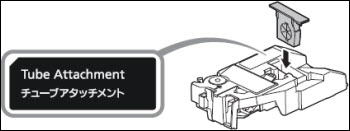
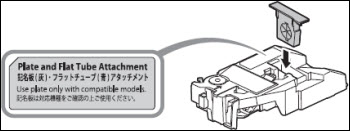
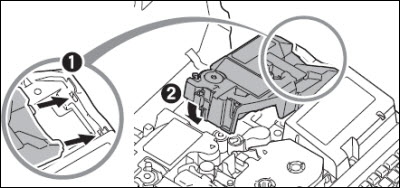
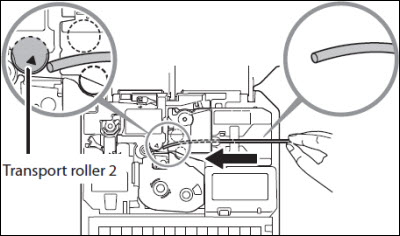
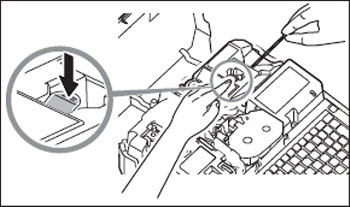
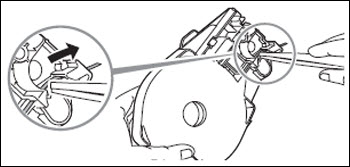
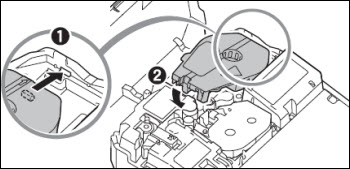
Loading a Tube
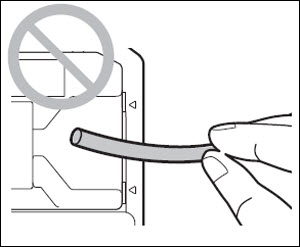
Do not use the following types of tubes. Not only will the product not print
cleanly, but use with such tubes may also cause a malfunction.
| Broken | Crushed | Twisted | Uneven thickness |
| Soiled | Uneven | Wet |
You cannot print on dirty tubes. Wipe off any dirt or dust with a dry cloth. Also,
do not use tubes that have oil or other stains that cannot be wiped off.
 Please purchase commercially available tubes for use.
Periodically clean or replace the cleaner of attachment. Dirt on the cleaner will cause print smears.
|
|
|
|
|
|
|
|
|
|
|
 |
|
|
|
|
|
|
|
|
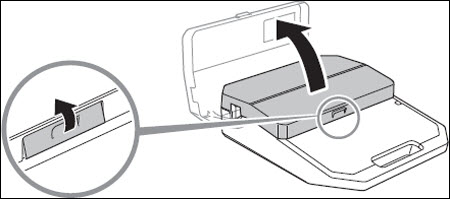
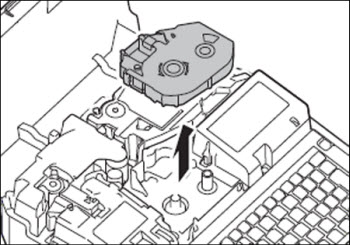
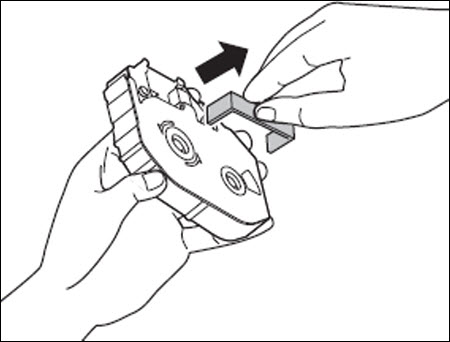
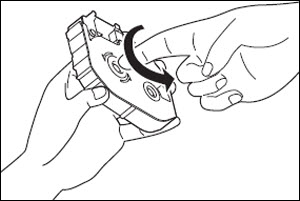
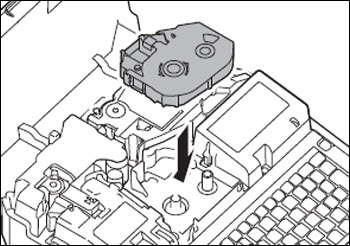
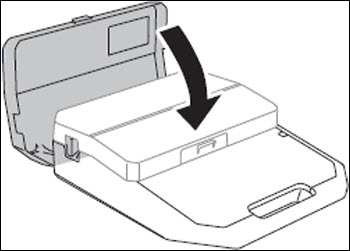
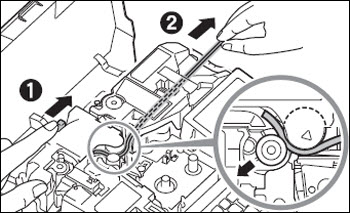
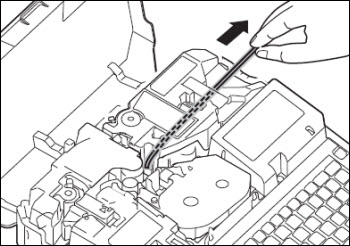
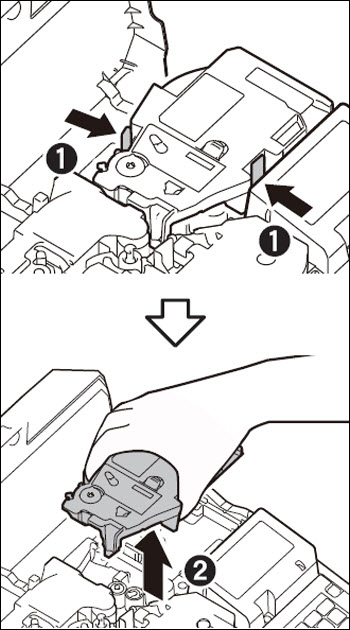
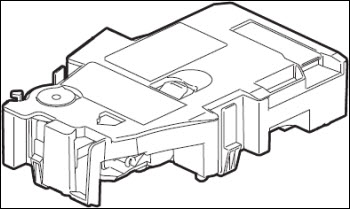
Load a Label Tape Cassette
Dispose the used label tape cassette according to local government regulation.
|
|
|
|
|
|
|
|
|
|
|

Replace the Print Media
To replace the print media installed in the printer with a different one, follow the procedure below.
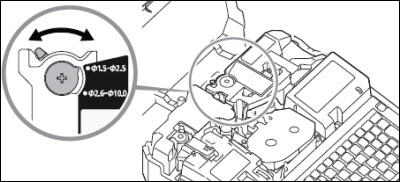
For Thin Tubes (ø1.5 mm)
|
|
|
|
|
|
For Other Print Media
|
|
|
|
|
|
|
|
|
|
|
|
|
|
![Select Yes and press the [Enter] key](https://support.usa.canon.com/library/CANON/CITS_TECH_SUPPORT/Printers/Mk%20Series/MK3000/Media/unload_print_media.jpg)
The tube warmer is an attachment that warms up tubes that have become stiff at low temperatures to make them easier to print on and feed into the printer.
Do not leave the tube warmer heated with a tube set in it. Excessive heating of
a tube may cause a fire.
Do
not put your fingers in the tube warmer's tube insertion and tube delivery ports. Doing so may result in burns.
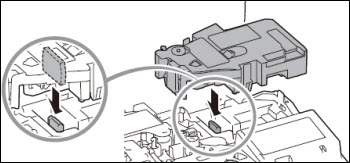
Set the Tube in the Tube Warmer
The
tube warmer can be used with the following tube types and sizes. This device cannot print correctly on other types of tubes.
Type: Tube, Clear tube
Size: ø1.5 to ø6.5 mm internal diameter
If the tube gets too warm, the device may not print on it correctly. Print as soon
as possible after loading the tube.
Do not use the following types of tubes. Not only will the product not print
cleanly, but use with such tubes may also cause a malfunction.
| Broken | Crushed | Twisted | Uneven thickness |
| Soiled | Uneven | Wet |
It is not possible to print on dirty tubes. Wipe off any dirt or dust with a dry
cloth. Also, do not use tubes that have oil or other stains that cannot be wiped off.
If the tube warmer cleaner is dirty, it may cause blurred printing. Clean or
replace it periodically.
|
|
|
|
|
|
|
|
|
|
|
|
|
|

When the tube warmer is not set, the tube warmer control settings are disabled.
If you cannot print correctly even with the tube warmer (for example, printing is
blurred), change the temperature setting of the tube warmer.
When "Label" or "Wrap Around" is selected for the print media in the print settings,
and "ON" is selected, "OFF" will appear on the display. To change the print media, press the [Print] key.
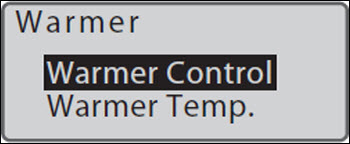
Change the Control Setting of the Tube Warmer
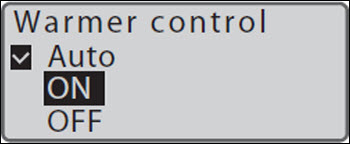
Switches between tube warmer settings.
| Setting | Details |
|
Auto (Auto) |
Only warms the tube during printing. When printing is executed, the tube will be warmed up to the set temperature, and then printing will start. |
|
ON (RDY) |
Warms the tube except while printing. When printing is executed, it starts printing immediately. "WAI" will be displayed when the set temperature is adjusted. |
|
OFF (OFF) |
Disables the tube warmer settings. |
[Example] To start printing immediately, set the warmer control setting to "ON".
|
|
|
|
|
|
|
|
|
|

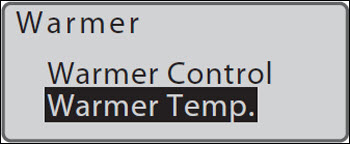
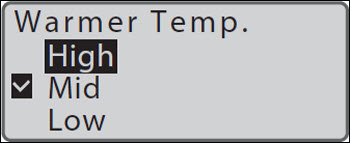
Change the Temperature Setting of the Tube Warmer
If you cannot print correctly even with the tube warmer (for example, printing is blurred), change the temperature setting of the tube warmer. The default setting is "Mid."
[Example] Printing is blurred, so set the tube warmer temperature to "High."
|
|
|
|
|
|
|
|
|
|
We recommend using the AC adapter when printing with the tube warmer, as it drains the batteries quickly. Also, if you want to print with less battery drain, set the warmer temperature to "Low."
If your product issue was not resolved after following the steps above, or if you require additional help, please create or log in to your Canon Account to see your technical support options.
Or if you still need help, visit our Canon Community by clicking the button below to get answers:

____________________________________________________________________________________________