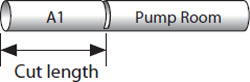
The length of one tube (or one label) is called the " Cut Length." The default setting is "Automatic."
|
Setting |
Details |
Print Image |
| Automatic (Default Setting) |
Automatically sets and prints the optimal cut length based on the number of characters entered, the size of the characters, and the spacing between the characters. The alignment is centered, and the margins are 2 mm on the left and 2 mm on the right. |

|
Specify |
Prints with the specified cut length. When "Specify" is selected for "Cut Length," you can specify the alignment (and margin). |
e.g.) "Left" alignment
 |
This is how the cut length and alignment are set. If you set the cut length to "Specify," you can change the alignment. The default setting for alignment is set to "Centered."
|
Setting
|
Details |
Print Image |
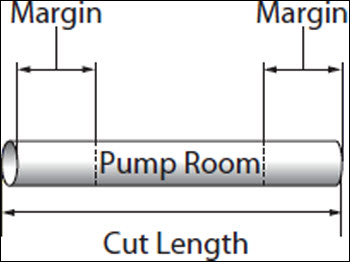
Centered
(Default Setting) |
Centers the text. |
|
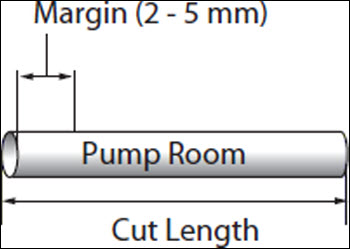
| Left |
Aligns text to the left end (in the direction of the start of the
text).
Margins can be set in the range of 2 to 5 mm. |
|
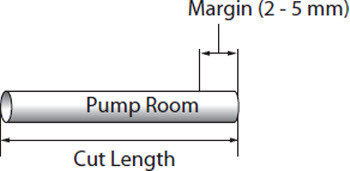
| Right |
Aligns text to the right end (toward the end of the text).
Margins can be set in the range of 2 to 5 mm. |
|
 When "Centered" is selected and the maximum number of characters for the cut length is used, the minimum margin is 0.7 mm in total for both sides.
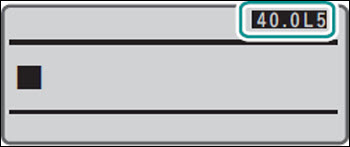
[Example] Creating a tube as follows.

- Press the [Length/Margin] key.
|
- Use [
 ]
or [ ]
or [ ]
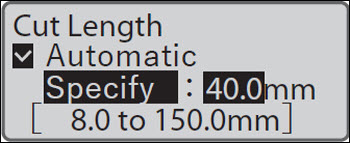
to select "Specify," enter "40.0" (Cut Length), and then press the [Enter] key. ]
to select "Specify," enter "40.0" (Cut Length), and then press the [Enter] key.
|
|
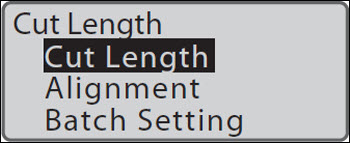
- Use []
or []
to select "Cut Length," and press the [Enter] key.
- The value can be set by entering numbers or using the arrow keys ([
 ]/[ ]/[ ]). ]).
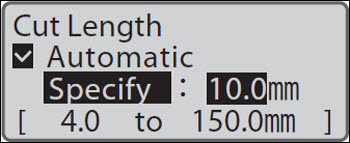
- Cut length can be entered in the range of 8 mm to 150 mm (4 mm to 150 mm for label only) in 0.1 mm increments.
- Press the [Enter] key to return to the character input display.
|
|
- Press the [Length/Margin] key.
|
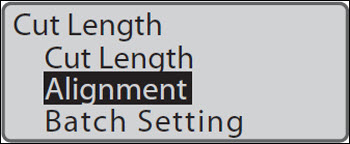
- Use []
or []
to select "Alignment" and press the [Enter] key.
|
|
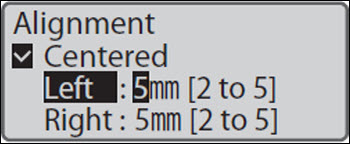
- Use []
or []
to select "Left" and enter "5" (margin).
- The value can be set by entering numbers or using the arrow keys ({ ]/[]).
|
|
- Press the [Enter] key.
- The display returns to the character input display. Input the characters.
- Cut length and alignment can be checked on the display.
|
|
The cut length and alignment can be set for each page.
Depending on the character size, some cut lengths cannot be specified.
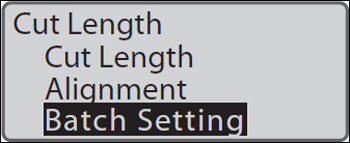
If you want to change the cut length of all pages, use "Batch Setting." In Batch
Setting, the "Cut Length," and "Alignment," settings are applied to all pages.
Approximately 60 mm from the print start position, there may be a slight difference between
the specified cut length and the print result.
Depending on your print media and environment, the cut length and margins may differ from
the settings. If the results are not as expected even after setting the cut length and margins, fine-tune the cut length and print position.
When the print media is a label, if the cut length is less than 8.0 mm, the alignment
is "Centered" and the settings cannot be changed.
You can set the Cut Length settings (Cut Length and Alignment) for all pages at once.
- Press the [Length/Margin] key.
|
- Use []
or []
to select " Batch Setting," and press the [Enter] key.
- The cut length setting screen will appear.
|
|
- Use []
or []
to select " Specify," enter the cut length, and then press the [Enter] key.
- The value can be set by entering numbers or using arrow keys ([]/[]).
- Press the [Enter] key, and the alignment setting screen will appear.
|
|
- Use []
or []
to select the desired setting, and then press the [Enter] key.
- When you select "Left" or "Right," set the margins.
- Press the [Enter] key to return to the character input display after the data has been checked and changed.
|

|
If there is data that exceeds the cut length due to changes in the batch settings,
a confirmation message will appear to delete the data that exceeds the cut length. To cancel the operation, select "No."
If you are unable to input text due to batch setting, set the cut length of the
page to "Automatic" or change the character size.

