To load plain paper, follow the steps below.
 You can also load photo paper or envelopes.
-
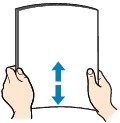
Align the edges of paper. If paper is curled, flatten it.
Align the edges of paper neatly before loading. Loading paper without aligning the edges may cause paper jams.
If paper is curled, hold the curled corners and gently bend them in the opposite direction until the paper becomes completely flat.
-
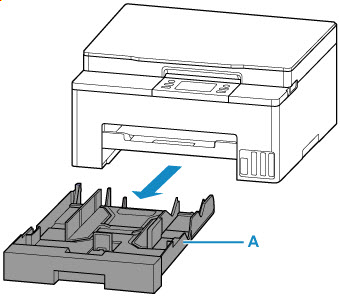
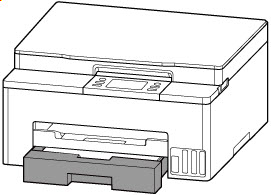
Pull out the cassette (A) from the printer.
-
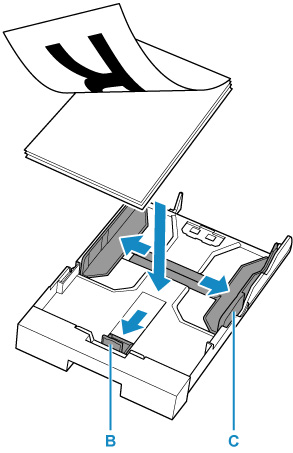
Slide the paper guides (B) in the front and (C) on the right to open guides.
Load the paper stack in portrait orientation WITH THE PRINT SIDE FACING DOWN, and place it in the center of the cassette.
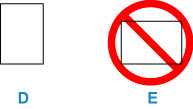
 Always load paper in portrait orientation (D). Loading paper in landscape orientation (E) can cause paper jams.
Align paper with the line on the cassette to load.
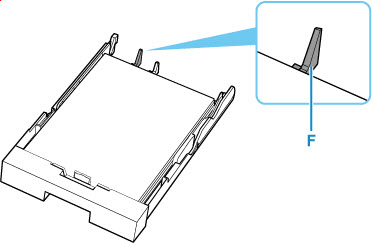
Paper may not be fed into the printer correctly if it presses against the protrusion (F).
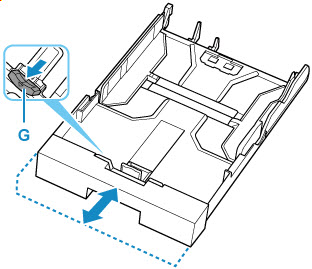
To load legal-size paper in the cassette, pull the resizing tab (G) forward to extend the cassette. Condense the cassette while pulling the resizing tab (G) forward.
-
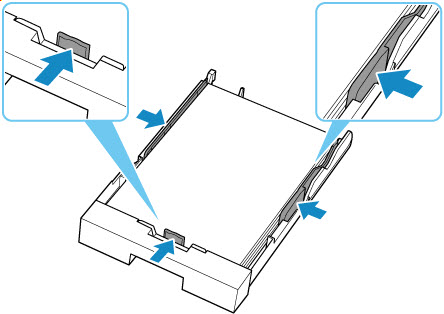
Move the paper guide and adjust the guides to edge of the paper stack.
Do not slide the paper guides too tightly against the paper. The paper may not be fed properly.
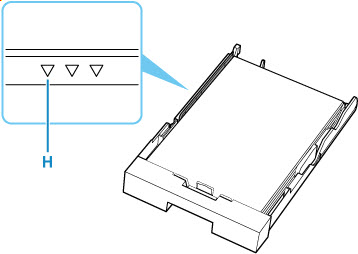
Do not load sheets of paper higher than the load limit mark (H).
-
Push the cassette into the printer until it stops.

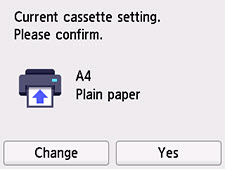
After inserting the cassette into the printer, the paper setting confirmation screen for the cassette appears on the touch screen.
When paper larger than A4 is loaded, the cassette is extended and thus stops in a protruding position from the printer. Forcefully pushing it in may cause damage to the printer or the cassette.
-
If the page size on the touch screen matches size of the paper loaded in the cassette, select Yes.
If not, select Change to change the settings in accordance with the size of the loaded paper.
-
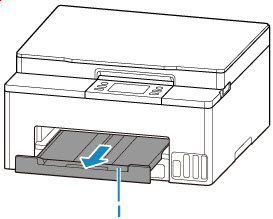
Pull out the paper output tray (I).
To prevent incorrect printing, this printer has a function that detects whether the settings for the paper loaded on the cassette matches the paper settings. Before printing, make print settings in accordance with the paper settings.
If your product issue was not resolved after following the steps above, or if you require additional help, please create or log in to your Canon Account to see your technical support options.
Or if you still need help, visit our Canon Community by clicking the button below to get answers:

____________________________________________________________________________________________
