EOS R100: Quick Start Guide
| Article ID: ART183732 |
| |
Date published: 09/11/2023 |
| |
Date last updated: 09/28/2023 |
Description
Quick Start Guide
Solution
|
Quick Start Guide
-
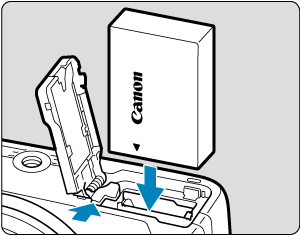
Insert the battery ().
- Upon purchase, charge the battery to start using ().
-
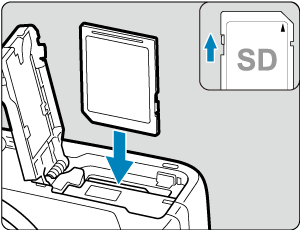
Insert the card ().
- Insert the card with the label facing the front of the camera until it clicks into place.
-
Attach the lens ().
- Align the red mount index on the lens with the red mount index on the camera to attach the lens.
-
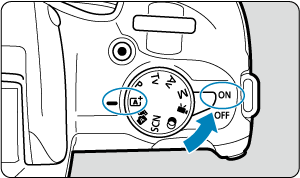
Set the power switch to  , then set the Mode dial to , then set the Mode dial to  (, ). (, ).
- All the necessary camera settings is set automatically.
- If the [Date/Time/Zone] setting screen is displayed, see Date/Time/Zone.
-
Focus on the subject ().
- A tracking frame [
 ] for AF appears over any face detected. ] for AF appears over any face detected.
- Press the shutter button halfway, and the camera will focus on the subject.
- If
 blinks on the screen, manually raise the built-in flash. blinks on the screen, manually raise the built-in flash.
-
Take the picture ().
- Press the shutter button completely to take the picture.
-
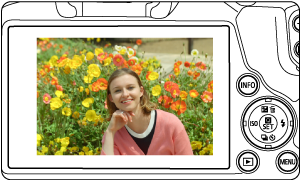
Review the picture.
- The image just captured will be displayed for approx. 2 sec. on the screen.
- To display the image again, press the
 button (). button ().
|
SIMS Doc Id
1691426880893393765