EOS R100: Basic Operations
| Article ID: ART183763 |
| |
Date published: 09/11/2023 |
| |
Date last updated: 09/28/2023 |
Description
Basic Operations
Solution
|
Basic Operations
Holding the Camera
To obtain sharp images, hold the camera still to minimize camera shake.
- With your right hand, hold the camera firmly by the camera grip.
- With your left hand, support the lens from below.
- Rest your right index finger lightly on the shutter button.
- Rest your arms and elbows lightly against the front of your body.
- To maintain a stable stance, place one foot slightly ahead of the other.
- Hold the camera near your face and look through the viewfinder.
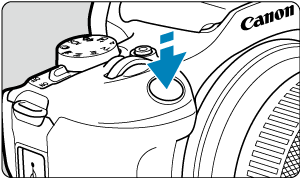
Shutter Button
The shutter button has two steps. You can press the shutter button halfway. Then you can further press the shutter button completely.
Pressing halfway
This activates autofocusing and the automatic exposure system that sets the shutter speed and aperture value.
The exposure value (shutter speed and aperture value) is displayed on the screen or in the viewfinder for 8 sec. (metering timer/ ). ).
Pressing completely
This releases the shutter and takes the picture.
Note
- The camera will still pause before taking a picture if you press the shutter button completely without pressing it halfway first, or if you press the shutter button halfway and immediately press it completely.
- Even during menu display or image playback, you can return to shooting standby by pressing the shutter button halfway.
 Dial Dial
Watch the screen as you turn the dial.
- Use this dial to set the shutter speed, aperture value, etc.
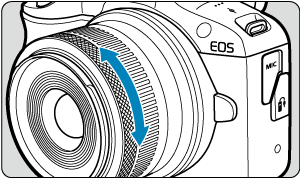
 Control Ring Control Ring
Exposure compensation can be set by turning an RF lens control ring while pressing the shutter button halfway in P, Tv, Av, or M mode.
Caution
- [
 : Focus/control ring] must be set when using lenses that have a combination focus/control ring but have no switch to switch between these features (). : Focus/control ring] must be set when using lenses that have a combination focus/control ring but have no switch to switch between these features ().
- The control ring of Control Ring Mount Adapter EF-EOS R has no effect.
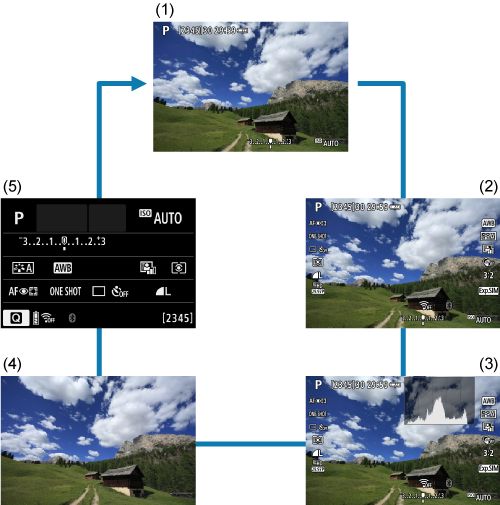
 Info Button Info Button
Each press of the button changes the information shown.
The following sample screens are for still photos.
In Basic Zone modes, the screen by (5) is not displayed.
|
SIMS Doc Id
1691426881092033102