Follow these steps to remove paper jammed inside the MAXIFY GX2020.
-
Press the printer's Stop  button.
-
Turn off the printer and unplug it.
-
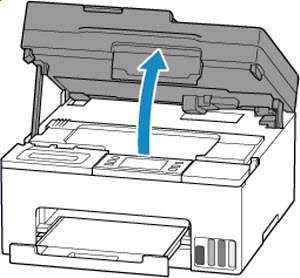
Open the scanning unit / cover.
 Do not touch the clear film (A), white belt (B), or tubes (C).

If you soil or scratch this part by touching it with paper or your hand, it could damage the printer.
-
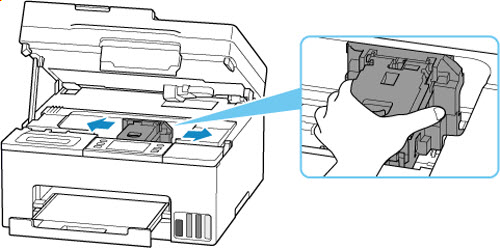
Check if jammed paper is under the print head holder.
If the jammed paper is under the print head holder, move the print head holder to the far right or left, whichever makes it easier to remove the paper.
When moving the print head holder, hold the print head holder and slide it slowly to the far right or left.
-
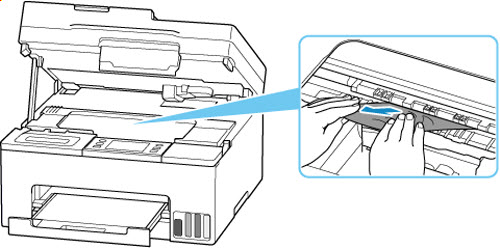
Hold jammed paper firmly with both hands.
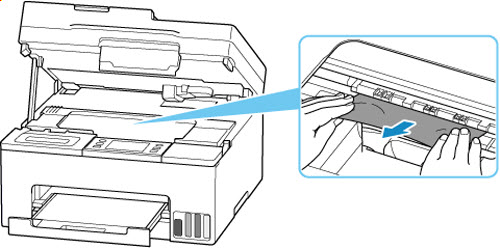
If the paper is rolled up, pull it out and grasp the edges of the paper.
-
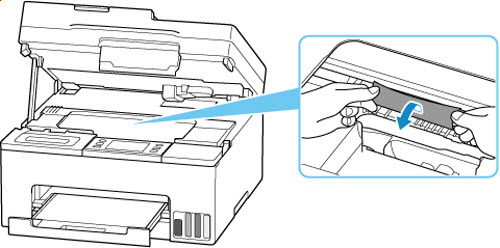
Slowly pull out jammed paper so as not to tear it.
Pull out the paper at an angle of about 45 degrees.
-
Make sure all jammed paper is removed.
If the paper tears when you pull out it, a bit of paper may remain in the printer. Check the following and remove any remaining paper.
-
Any paper left under the print head holder?
-
Any small bits of paper left in the printer?
-
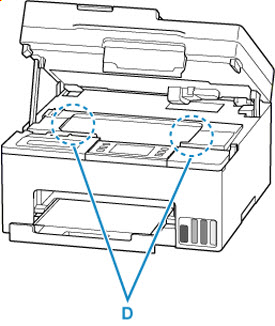
Any paper left in the left and right empty spaces (D) in the printer?
 If you are unable to remove the jammed paper, detach the rear cover and remove the jammed paper from the rear side.
-
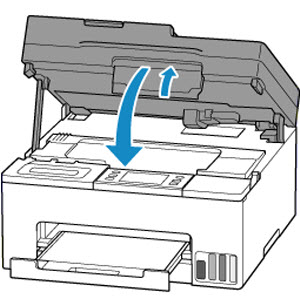
To close the scanning unit / cover, lift it up slightly and then lower it gently.
-
Plug printer back in and turn printer back on.
-
Load plain paper, photo paper, or envelopes.
 Make sure you are using suitable paper and loading it correctly.
-
All jobs in the print queue are canceled. Redo the printing.
If your product issue was not resolved after following the steps above, or if you require additional help, please create or log in to your Canon Account to see your technical support options.
Or if you still need help, visit our Canon Community by clicking the button below to get answers:

____________________________________________________________________________________________
