To clean the ADF (Auto Document Feeder), be sure to use a damp cloth that has been wrung properly and a clean, dry cloth made of soft, fine-textured fabric that does not produce lint.
 Before cleaning the printer, turn it off and unplug it.
-
The power cannot be turned off while the printer is sending or receiving a fax, or when unsent faxes are stored in the printer's memory. Make sure the printer has finished sending or receiving faxes before turning it off.
-
Remember that faxes cannot be sent or received while the printer is off.
To avoid scratching surfaces, do not clean with tissue paper, paper towels, or rough-textured cloth. Additionally, paper dust or fibers may remain in the printer and clog the print head or affect printing quality.
Never clean the printer with detergent or volatile chemicals such as thinner, benzine, or acetone, which may cause malfunction or damage surfaces.
-
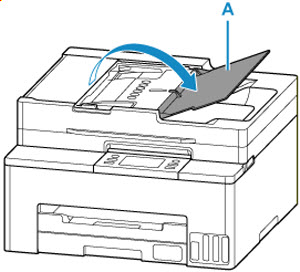
Open the document tray (A).
-
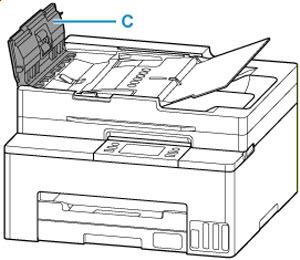
Open the document feeder cover (B).

-
Using the prepared dry cloth, wipe off any paper dust from the inside of the document feeder cover (C).
-
After wiping, close the document feeder cover by pushing it until it clicks into place.
-
Close the document tray.
-
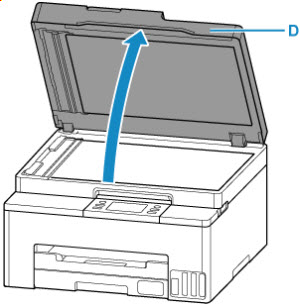
Open the document cover (D).
-
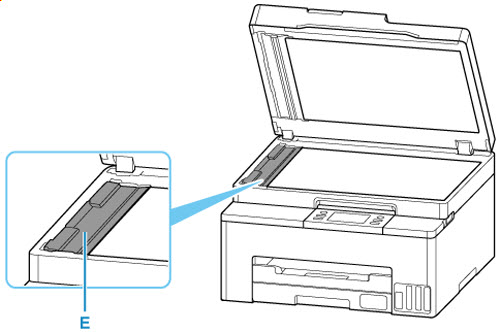
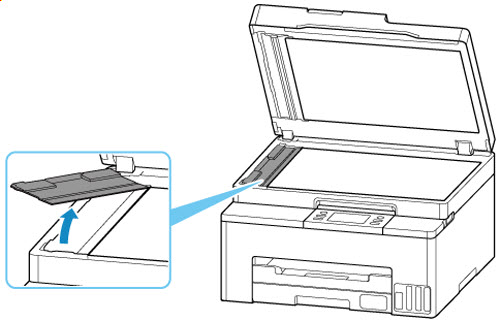
Wipe the ADF scan helper (E) with the damp cloth that has been wrung out, then wipe with the soft, dry cloth.
-
Holding the handle, gently remove the ADF scan helper from the back.
-
Wipe the backside of the removed ADF scan helper with the damp cloth that has been wrung out, then wipe with the soft, dry cloth.

-
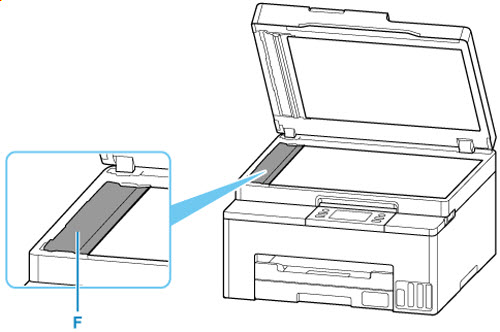
Wipe the document scanner (F) with the damp cloth that has been wrung out, then wipe with the soft, dry cloth.
-
Wait until it is completely dry.
-
Reattach the ADF scan helper.
Check the direction and reattach gently from the front.

-
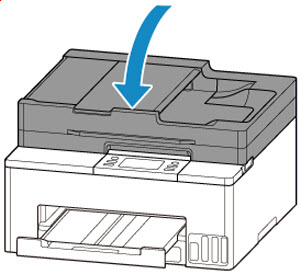
Gently close the document cover.
If your product issue was not resolved after following the steps above, or if you require additional help, please create or log in to your Canon Account to see your technical support options.
Or if you still need help, visit our Canon Community by clicking the button below to get answers:

____________________________________________________________________________________________
