There are a few things to know about printing envelopes before you begin.
Don't load envelopes higher than the load limit mark (max 10 envelopes) (F). Keep the stack height below the tabs (G) of the paper guides.
Things to know
-
You can load US #10 or European DL size into the lower tray. The tray holds up to 10 envelopes.
-
When you select a size from the printer driver settings, your printer automatically rotates the text to be printed.
-
Envelopes can't be printed directly from the printer's operation panel or from a connected digital camera.
-
Don't use:
-
Envelopes with an embossed or treated surface.
-
Envelopes with a double flap.
-
Envelopes with gummed flaps that are moistened and adhesive.
Prepare and load the envelopes
-
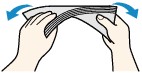
Press down on all four corners and edges to flatten each envelope.
-
Fix any curled edges or corners by twisting the envelope in the opposite direction.
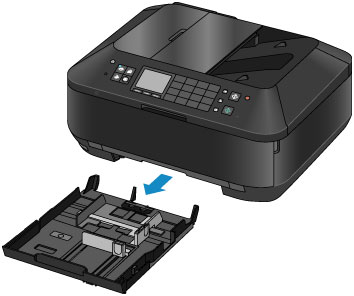
- Pull out the lower paper tray.
-
Slide the paper guides (A) and (B) to open (see the image in step 3 below).
-
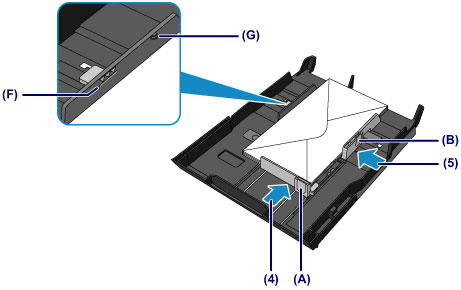
Place the envelope stack in the center of the paper tray with print side facing down (3). The folded flap of the envelope will be facing up and on the left side.

-
Align the stack with the edge of the tray, but don't let it touch the tab (E) (see image above).
-
Align the front paper guide (A) with the envelope stack.
-
Slide the side paper guides (B) to align with sides of the envelope stack.
 If the guides are too tight against the stack, the envelopes may not feed properly. Don't load envelopes higher than the load limit mark (max 10 envelopes) (F). Keep the stack height below the tabs (G) of the paper guides.
-
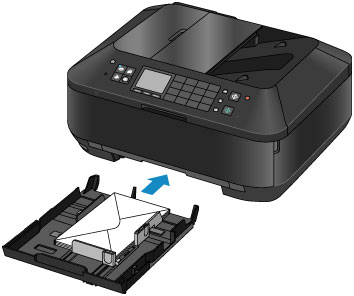
Insert the lower paper tray into the printer, pushing it until it stops.
-
Open the paper output tray by gently pulling on sides.

-
Select the size and type of the loaded envelopes in the print settings on your computer's printer driver. You are ready to print.
Good to know
You can load and print a variety of media, including:
