|
Load the paper that you usually use in the paper drawer. When you want to print on paper that is not loaded in the paper drawer, load the paper in the manual feed slot. ( Loading Paper in the Manual Feed Slot )
IMPORTANT
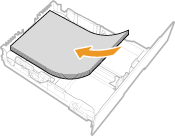
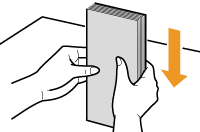
- Make sure to load paper in portrait orientation
Paper cannot be loaded in landscape orientation. Make sure to load the paper in portrait orientation, as shown in the illustration.
NOTE
Follow the procedure below when loading paper into the optional paper drawer (MF8580Cdw only).
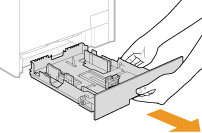
1. Pull out the paper drawer.
- Hold the paper drawer with hands and pull it out gently.
 IMPORTANT:
Make sure to hold the paper drawer with hands. Otherwise, you may damage the paper drawer by dropping it, if it slides out too easily.
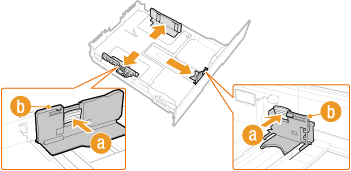
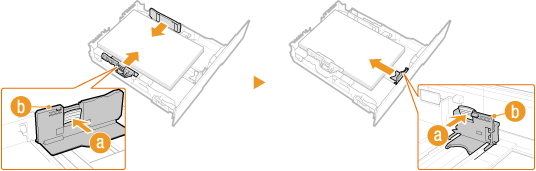
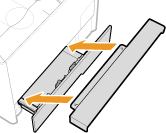
2. Slide the paper guides apart.
- Press the lock release lever (a) to slide the paper guides (b) outward. On the MF8280Cw, there is no lock release lever for the side paper guides.
 NOTE:
NOTE:
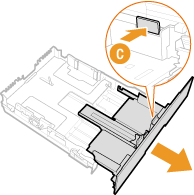
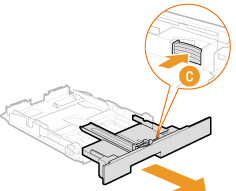
When loading Legal size paper
Press the lock release lever (c), and extend the paper drawer.
MF8580Cdw
MF8280Cw
 Size abbreviations on the paper guides
The abbreviations on the paper guides in the paper drawer indicate paper sizes as follows:
- LGL: Legal
- LTR: Letter
- EXEC: Executive
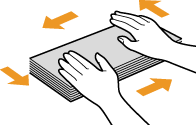
3. Load the paper so that the edge of the paper stack is aligned against the rear side of the paper drawer.
- Fan the paper stack well, and tap it on a flat surface to align the edges.
IMPORTANT:
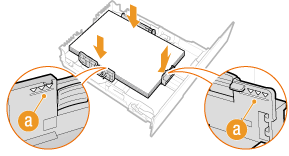
Do not exceed the load limit mark when loading paper
Make sure that the paper stack does not exceed the load limit mark (a). Loading too much paper can cause paper jams.
4. Align the paper guides against the edges of the paper.
- Press the lock release lever (a) and slide the paper guides (b) inward until they are aligned securely against the edges of the paper.
 IMPORTANT:
Align the paper guides securely against the edges of the paper
Paper guides that are too loose or too tight can cause misfeeds or paper jams.
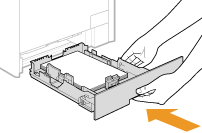
5. Insert the paper drawer into the machine.
NOTE:
When Legal size paper is loaded
The front side of the paper drawer is not flush with the machine when the extended paper drawer is inserted. Place the legal dust cover over the open part of the paper drawer.
6. Specify the size and type of loaded paper.
IMPORTANT:
When changing the paper size or type
The factory default settings for paper size and type are <LTR> and <Plain 2>, respectively. If you load a different size or type of paper into the machine, make sure to change the settings. If you do not change the settings, the machine cannot print properly.
REFERENCE
 Printing on the Back Side of Printed Paper (Manual 2-Sided Printing)
You can print on the back side of printed paper. Flatten any curls on the printed paper and insert it into the paper drawer or manual feed slot ( Loading Paper in the Manual Feed Slot ), with the side to print face up (previously printed side face down).
- When using the manual feed slot, load one sheet of paper each time you print.
- You can use only the paper printed with this machine.
- You cannot print on the side that has previously been printed on.
- If the printouts look faded, select <On> for <Drawer 1>, <Drawer 2>, or <Multi-Purpose Tray>, depending on the paper source you are using, in <Manual Back Side Settings (for 2-Sided Only)>.
- If you are using A5 paper, the reverse side may not be printed correctly.
- Before Loading Envelopes
Follow the procedure below to prepare the envelopes before loading.
NOTE
On the MF8280Cw, only one envelope at a time can be loaded into the manual feed slot. Follow steps 1 to 3 in the procedure below to prepare the envelope for loading.
(1) Close the flap of each envelope.
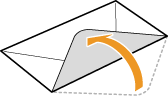
(2) Flatten them to release any remaining air, and make sure that the edges are pressed tightly.
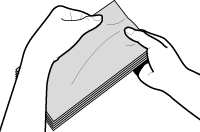
(3) Loosen any stiff corners of the envelopes and flatten any curls.
(4) Align the edges of the envelope on a flat surface.
- In the Paper Drawer
Load the envelopes Monarch (MF8280Cw only), COM10, DL, or ISO-C5 in portrait orientation (with the long edges on either side), with the non-glued side (front side) face up. You cannot print on the reverse side of envelopes.
NOTE
- Monarch size envelopes cannot be loaded in the paper drawer on the MF8580Cdw. Load them into the manual feed slot.
- Load the envelopes so that the edge with the flap is toward the left side as shown in the illustration.

|

