Number of Characters That Can Be Entered
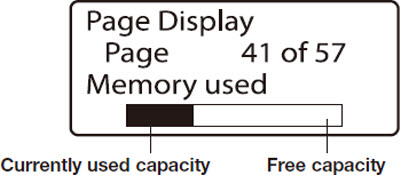
The printer can accept data input of approximately 5000 characters on all pages combined. If the printer's capacity is exceeded, the messages Not enough memory Character input is no longer possible appears. If this occurs, save all text data, delete all characters that are displayed on the display, then continue entering new characters.
You can also press [Page] to display the following display, where you can check how much space is available.
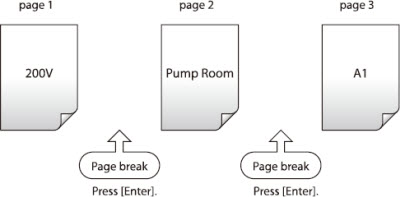
What is a Page?
As used in relation to the printer, the term Page has special meaning. The text entries 200V, Pump Room, and A1 that were entered are actually entered on three separate pages. A new page is automatically created whenever you enter characters and press [Enter].
Viewing Data from a Previous Page
If there is a page preceding the currently displayed page,  appears in the upper left corner of the display. If you press the key and move the cursor to the left past the first character that is currently shown on the display, the display will change to show the character data from the preceding page. You can also jump to the preceding page by pressing Shift + .
If there is a page following the currently displayed page,  appears in the upper right corner of the display. If you press the key and move the cursor to the right past the last character that is currently shown on the display, the display will change to show the character data from the next page. You can also jump to the preceding page by pressing Shift + .

Print
After entering the characters, follow these steps to start printing.
|
1. Press [Print].
 No ribbon cassette is displayed if the ribbon cassette is not installed. Install the ribbon cassette. No ribbon cassette is displayed if the ribbon cassette is not installed. Install the ribbon cassette.
No ribbon information. No ribbon amount displayed. Press enter is displayed if the information cannot be read due to the ribbon cassette failure and so forth. If this message is diaplayed, follow the instructions on the screen.
Print media is the material that you are printing on, such as a tube, heat shrink tube, label tape, wrap around tape, 4mm I.D. strip, plate, or clear tube.
|
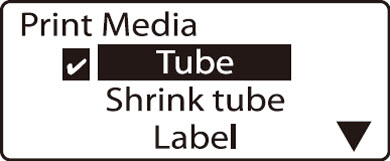
A check mark is displayed next to the currently selected print media.
|
|
2. Press  or or  to select Tube, then press [Enter]. to select Tube, then press [Enter].
Press or to select Clear tube, then press [Enter].
|
A check mark is displayed next to the currently selected print media.
|
|
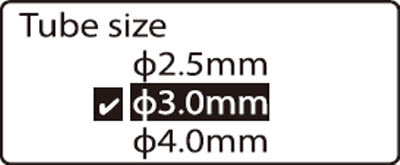
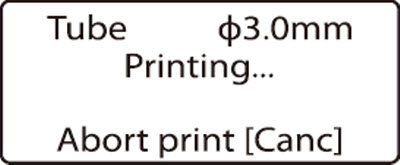
3. Press or to select 3.0mm, then press [Enter].
Select the correct tube size. Printing will not be performed correctly if you do not select the correct tube size.
A rough amount of the remaining ink ribbon is displayed. When the information of the cassette is not properly retrieved, the amount of the ribbon does not appear.
|
|
|
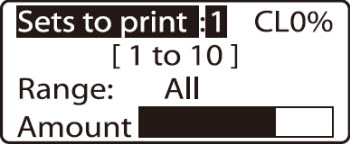
4. Press or to select Sets to print, then press 4.
If Range: All is not selected, press or to select Range, then press or to select All.
|

|
|
5. Press [Enter].
 If you press [Canc], the message Aborting print appears and printing is aborted. In this case, the tube that is currently being printed is cut and then ejected. If you press [Canc], the message Aborting print appears and printing is aborted. In this case, the tube that is currently being printed is cut and then ejected.
|
|
|
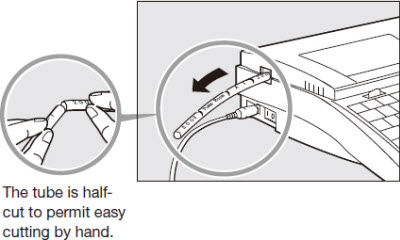
6. Take out the tube.
If a tube jams, hold down [Canc] until the printer beeps. The printer stops all operations immediately. In this case, the tube is not cut and it is not ejected. |
|
If your product issue was not resolved after following the steps above, or if you require additional help, please create or log in to your Canon Account to see your technical support options.
Or if you still need help, visit our Canon Community by clicking the button below to get answers:

____________________________________________________________________________________________
